On traditional gaffers, the gaff jaws are often covered in leather to help them slide along the mast and prevent wear on the mast. Whilst the Crabber 26 is not a traditional gaffer, I do like the “leather look” and it’s not that hard to do.
When we bought Molly, I noticed there was quite a bit of wear on the mast where the gaff saddle sits, especially in the position when the sail is furled. Some wear is inevitable on a gaffer, but it seemed excessive. Inspecting the gaff saddle, which is a pretty substantial piece of stainless on a Crabber 26, I could see that it was lined with a piece of plastic resembling a vinyl floor tile. Over time, this had cracked and split at the edges and appeared to be the cause of the wear. One thing I’ve long made a habit of doing when moored is to use an extra line to secure the boom towards the stern quarter and stop it moving. I’m sure over time, the constant shifting of the boom considerably adds to wear where the gaff saddle sits against the mast.
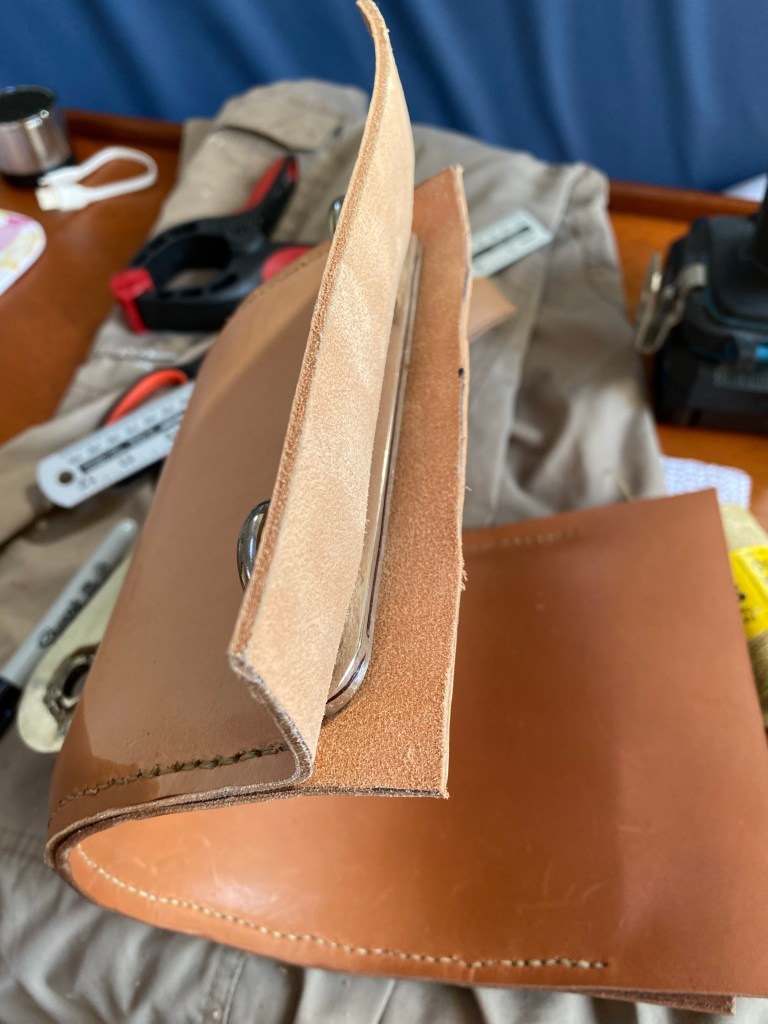
I have some experience of leathering gaff jaws on my previous boat, but the design of the gaff jaws is quite different on the Crabber 26 to my previous boat, a Cape Cutter 19. I took advice from those in the know, and Sue Pennison in the Solent OGA was very helpful. She suggested a “sandwich” arrangement using a saddle stitch. I bought my materials from Classic Marine in Suffolk, costing about £40 for the whole job. They supply pieces of the correct type leather; you simply specify the size you need and they charge you by the square foot (!). They also see tough rot-proof twine and sail-makers needles. Before starting, I took a diploma at the University of YouTube on how to do the saddle stitch (easy!). The photos below show the main stages in the process.
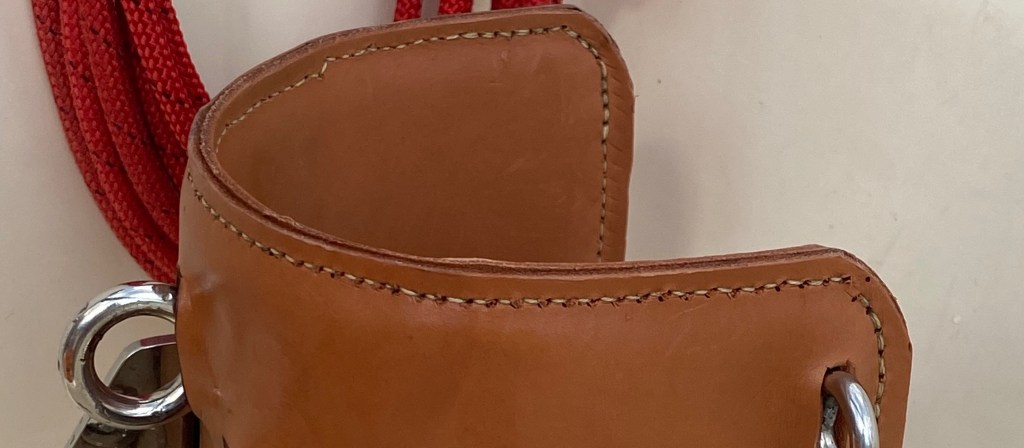
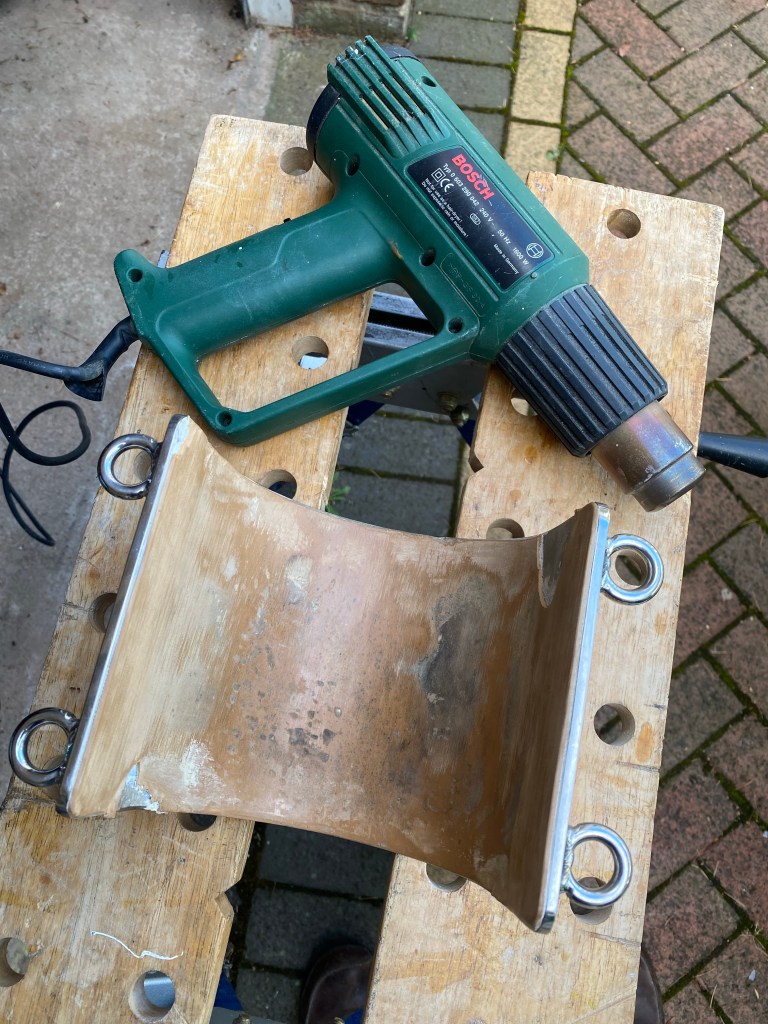
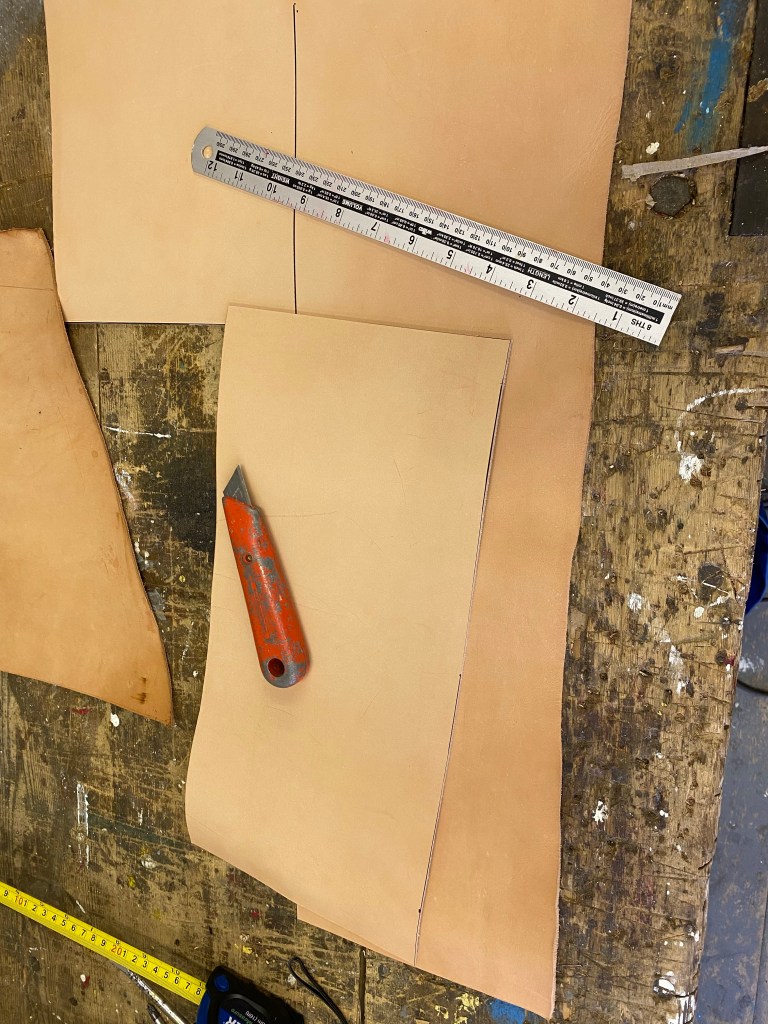
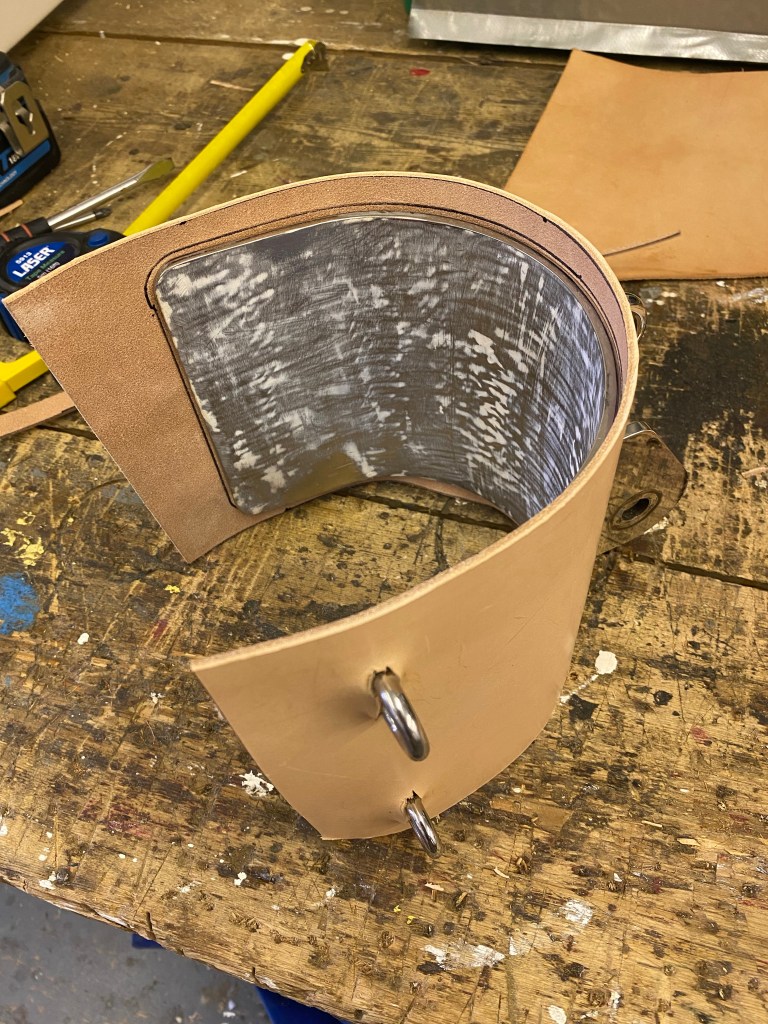
The condition of the gaff saddle when I started; you can see the damage to the original lining which I think was the cause of my mast wear. I used a paint stripper to warm the plastic and soften the adhesive – this made removing the material much easier, but I was careful to minimise heating of the metal. The leather was supplied in large rough cut pieces. After very careful measurements, I cut a piece which was the correct height (allowing for a 5mm seam top and bottom) but over-long, because I was not sure how much length I needed as the leather was stitched around the curve. The trickiest part was making cut-outs for the various fittings on the back of the saddle. Despite my careful measurements, I did make one mistake (one of the large slots was too big). Measure twice (or more!), cut once… Fortunately this error does not show when the saddle is fitted. You can see I drew an outline of the metal and then added the seam allowance. Trial fitting of the outer section. The inner piece was very easy to cut. I measured along the leather with my trusty Portland dividers, and marked with a sharpie where the holes should be, so the stitching would look even. Before fitting, I wetted the leather, to make it more supple. I held the sandwich in place with small clamps and then drilled holes. I made the holes in small batches, so that the position would be right, as the leather conformed to the curve of the saddle. Saddle stitch is a very easy stitch, using two needles cross-crossing each other. Very satisfying work!Top and bottom now stitched. The leather is ready for trimming to size at the ends.The ends now trimmed to size. I let the leather dry and then cut with a good pair of scissors. Note the holes drilled in measured positions, ready for stitching. The finished work! Overall I’m really happy with the result – looks great and, a few months later, much less wear on my mast.
When we took on Molly at the beginning of the season, I spent some time doing a bit of winter maintenance and getting to know the systems aboard. I decided that I would not change or add anything during the first season, but would sail her and thoroughly understand how things worked before changing anything. There was one exception to this, and that was a battery monitor – I was uncomfortable not having any means of monitoring the voltage and charging of the leisure and starter batteries, particularly as the previous owner told me that the first time he came to use her, the batteries were flat and needed replacing. Rather than fit another display in the cockpit or cabin, I chose a bluetooth unit, which has been excellent. It tells me the voltages and dis/charge rates at a glance and the bluetooth range is enough for me to read when I am in the car park and Molly is on her berth!
If you’re interested in the details, have a look at this video I made of the installation: https://youtu.be/GZ07bel7T6A